One thing every cool action-game should have, at least in my opinion, is something like a rocket launcher. In our case, it is the death bringing Ro-Cat-Paw-Launcher, which shoots, surprise surprise, cat paws.
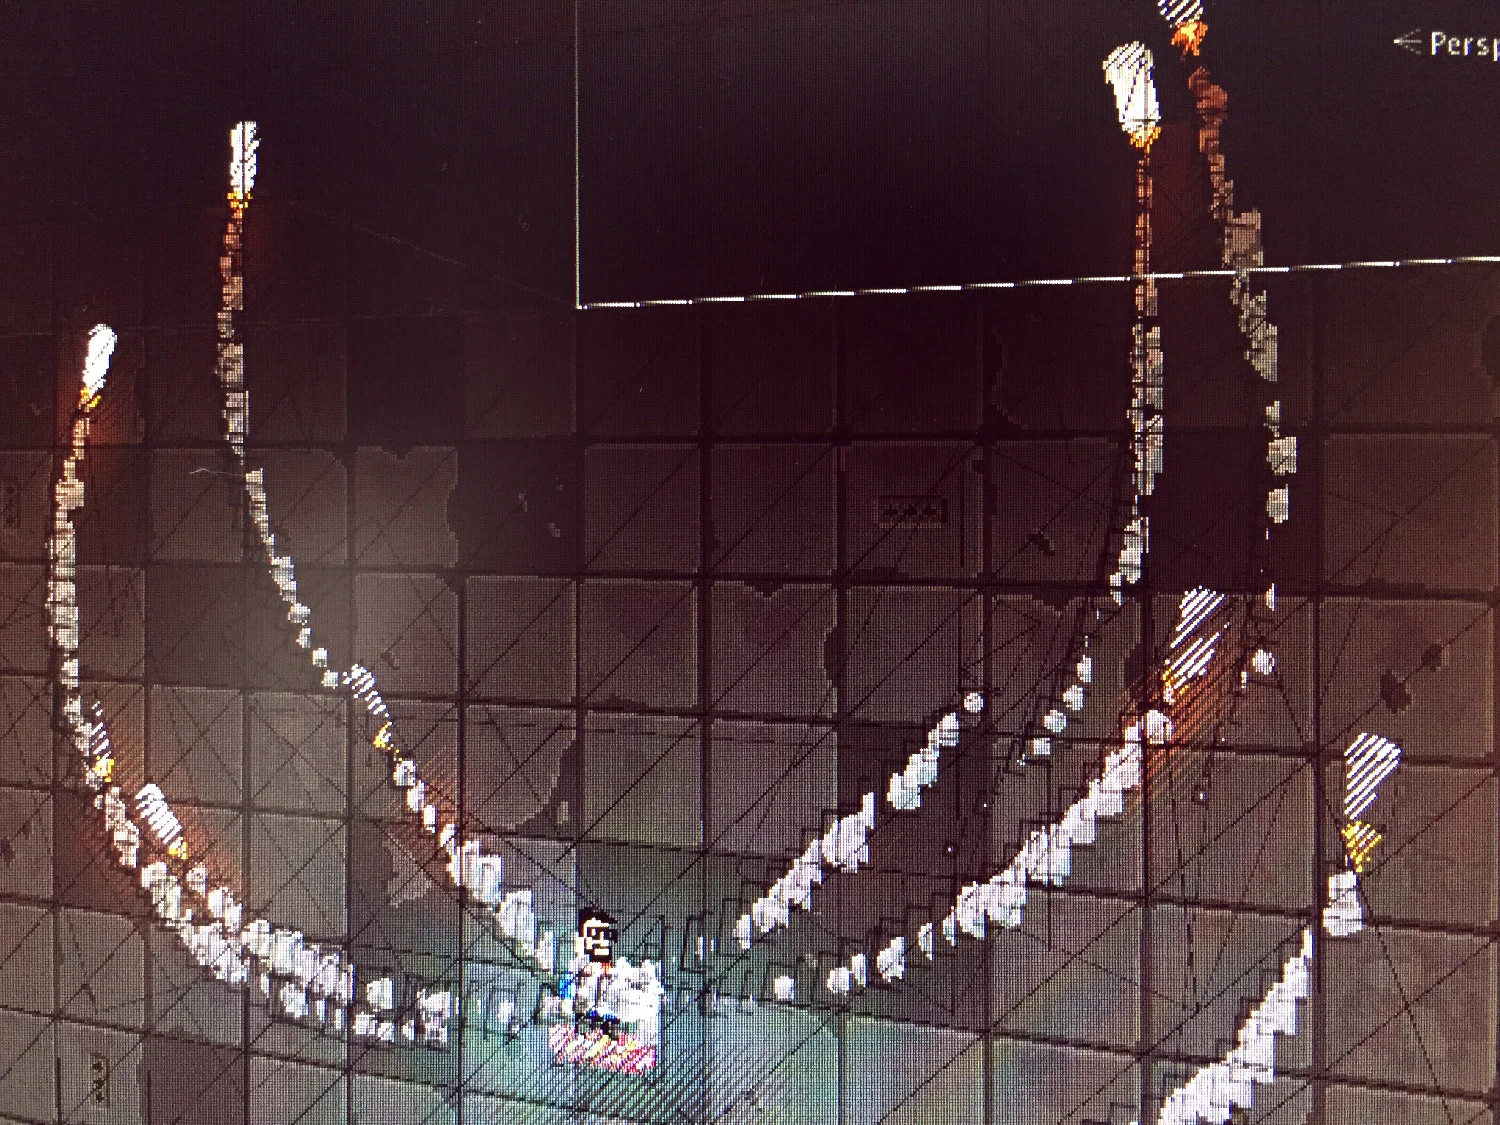
The main idea behind our version of the rocket launcher is, that the launched rockets start to fly along a nice curve and chase the nearest enemy after that.
To achieve that I did the following: The rocket itself is moved by an added velocity every frame. To chase the chosen enemy the rocket changes its rotation, in a limited angle each frame, toward the enemy. To prevent the rocket to circle around an enemy I increase the possible turn angle by a given amount over time.
Create the rocket with a smoke trail

Since I you may already know how you create a simple GameObject with an animated sprite renderer I want to give you some insights on how we created the smoke trail – which gives the whole scene a nice atmosphere. But basically, it's nothing less than a particle emitter with an animated texture.
- Create a new Material from the Smoke trail sprite called "Smoke" and set the shader to "Sprites/Default"
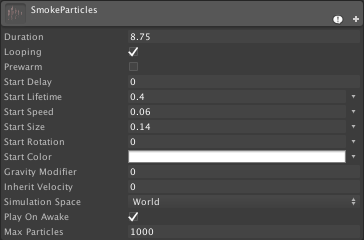
- Create a new ParticleSystem and set the Simulation Space to "World" – This is one of the most important parts. Every particle will stay where it was emitted (if speed is 0) and will not be moved by the parent object.
- Setup speed, lifetime, size and the other parameters to whatever may fit your purpose. We wanted to reduce the movement of the particles to a minimum since the trail movement is already generated by the rocket.
- As a shape we've used a pretty narrow cone, so the particles will be emitted at one central point (after burner)
- In order to smoothly dissolve the particles after a while we make use of "Color by Speed" to fade out and "Size over Lifetime" to scale out the particles.

- To give every particle as much dynamic as possible we've also added a little "Rotation over Lifetime"
- Finally to the magic part: activate "Texture Sheet Animation" set the tiles to the number of sprites you have. In our case its just 5 sprites on the x-axis.
- Drag the material you've created in the first step into the material slot and you are good to go.

The Launcher
private IEnumerator LaunchRockets(EnemyController target){
       for(int i=0;i < rockets;i++){
           float rotation=0f;
           if(i%2==0){
               rotation=Random.Range(-140f, -45f);
           }else{
               rotation=Random.Range(45f, 140f);
           }
           GameObject rocketGO=Instantiate(rocketPrefab, startPosition,
               Quaternion.Euler(0f, 0f, rotation)) as GameObject;
           Rocket rocket=rocketGO.GetComponent();
           rocket.Target=target;
           rocket.MissileSpeed=missileSpeed;
           yield return new WaitForSeconds(delay);
       }
   }
The Rocket
newRotation = Quaternion.LookRotation(transform.position - Target.transform.position,
    Vector3.forward);
newRotation.x = 0.0f;
newRotation.y = 0.0f;
transform.rotation = Quaternion.Slerp(transform.rotation,
    newRotation, Time.deltaTime * turn);
rocketRigidbody.velocity=transform.up * MissileSpeed;
if(turn<40f){
    lastTurn+=Time.deltaTime*Time.deltaTime*50f;
    turn+=lastTurn;
}
The Result

Download Unity 5 Sample Project
As usual, we want to share a sample project with you – so, it's much easier to understand what we are talking about. Same as last time, be fair and don't use the graphic assets in your own games.